 Save
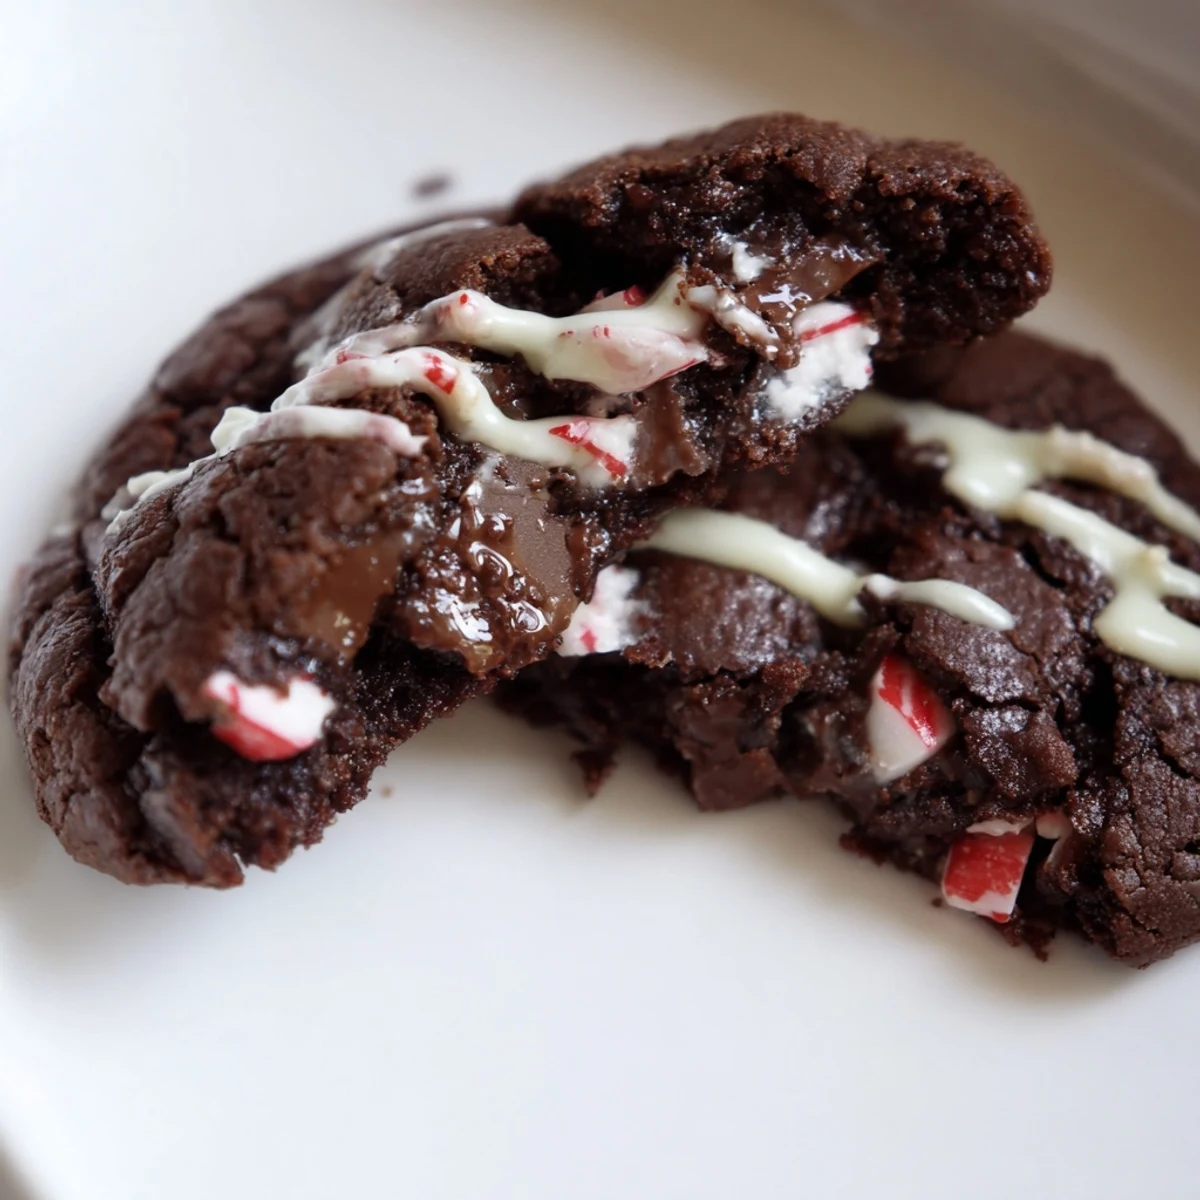
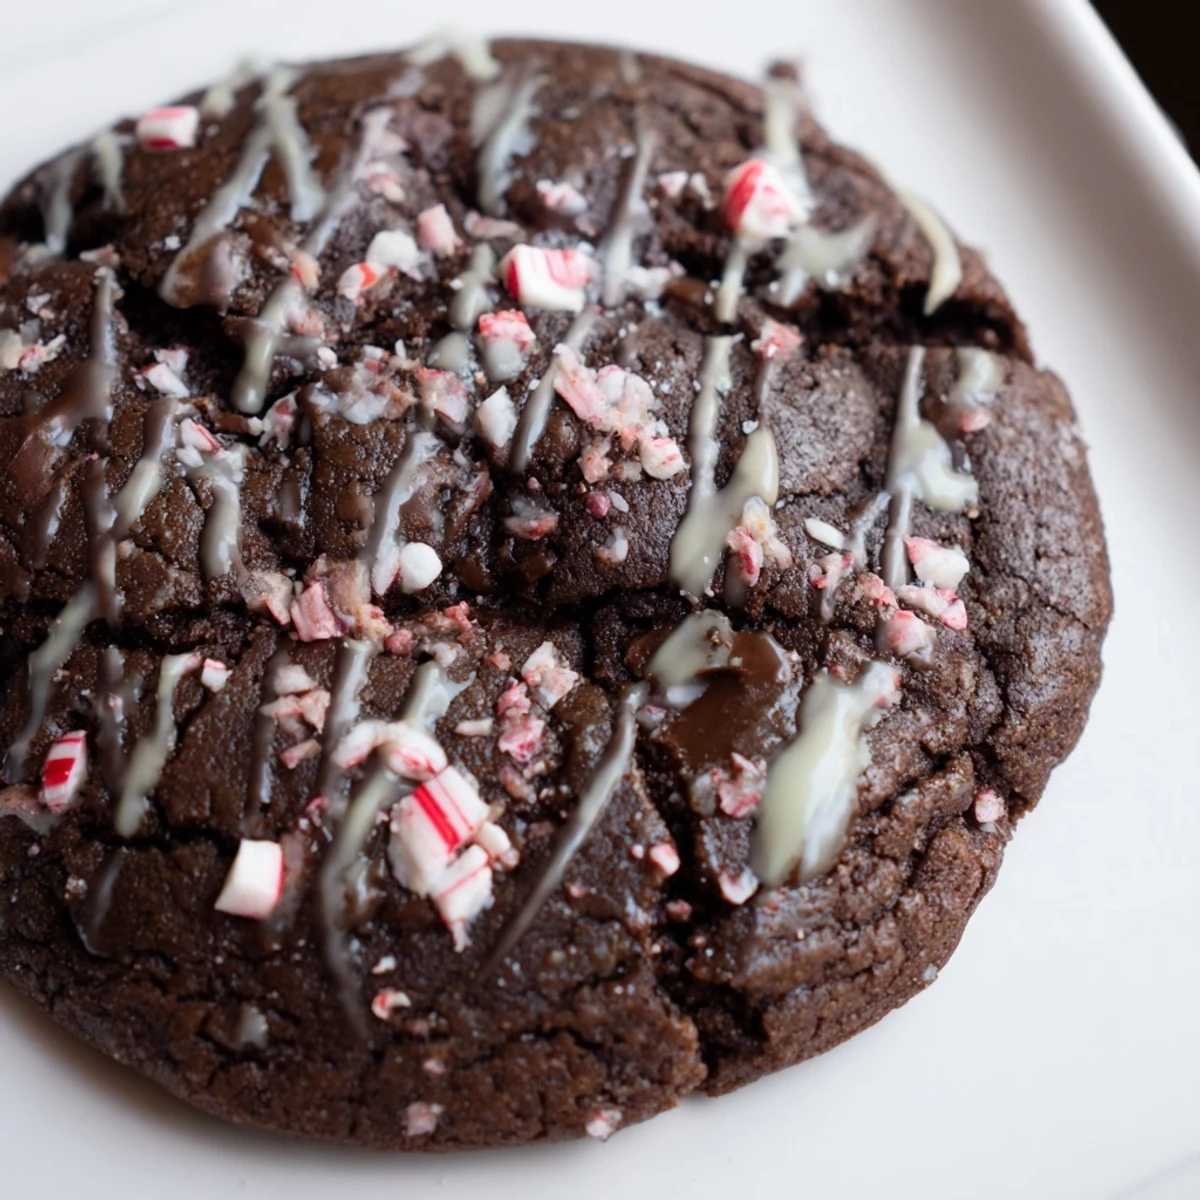
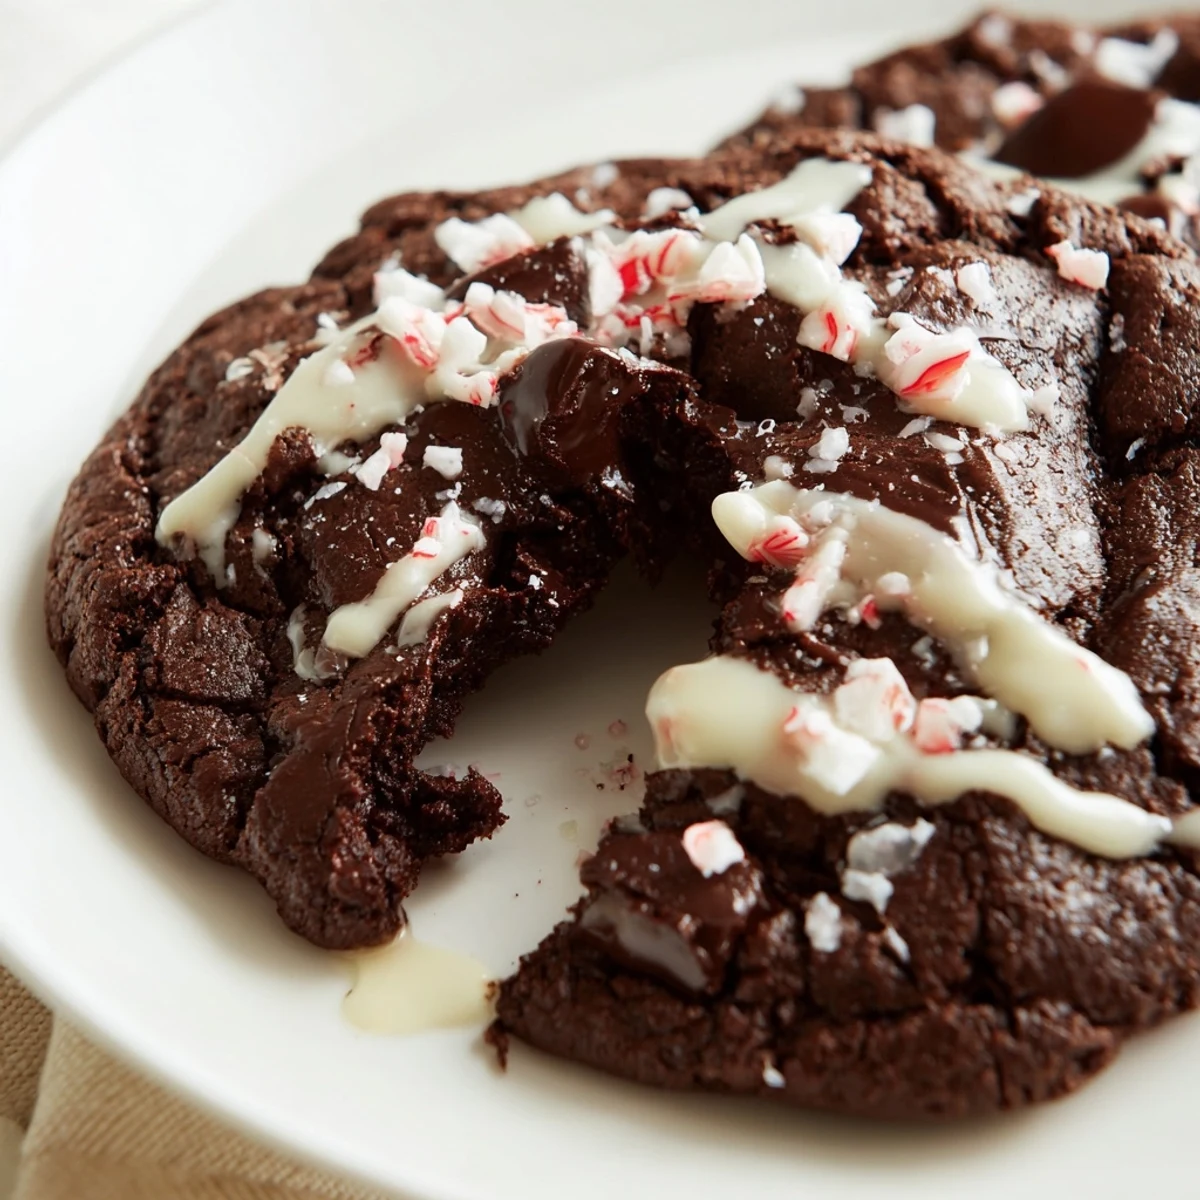
Save These fudgy mocha cookies blend rich espresso with refreshing peppermint and generous chocolate chunks. Soft in the center with crisp edges, they're finished with a festive drizzle of melted white chocolate and crushed peppermint candies. Simple to prepare in under 30 minutes, they bring a perfect balance of flavors ideal for cozy holiday moments. Chilling the dough enhances chewiness, and substituting dark chocolate creates extra depth. Store in airtight containers to keep their tender texture intact.
There's something magical about the moment when espresso powder hits warm chocolate batter—that sudden, sophisticated aroma that makes you pause mid-stir. I stumbled onto these cookies last December while hunting for something that felt both grown-up and festive, something that wouldn't disappear the moment they hit the cooling rack. The peppermint and dark cocoa combination came from remembering how my coffee shop orders peppermint mochas in winter, and I thought, why not bake that feeling? These turned out to be the kind of cookies people ask for by name.
I made these for my book club last winter, and watching them bite through that white chocolate drizzle into the peppermint-studded center was worth every minute of prep. One friend came back asking for the recipe because her kids declared them better than anything from the fancy bakery downtown, and honestly, that felt like winning.
Ingredients
- All-purpose flour (1 1/4 cups): The structure of the cookie; I always spoon and level mine because scooping compacts it and makes them dense.
- Unsweetened cocoa powder (1/2 cup): Use good quality here because it's front and center in every bite; the 100% cocoa sets the tone for everything else.
- Instant espresso powder (1 tbsp): This is non-negotiable—it amplifies chocolate flavor without adding coffee taste, but don't skip it thinking you'll use instant coffee instead.
- Baking soda (1/2 tsp) and salt (1/4 tsp): These seem small but they're what gives the cookies that slight crispy edge while keeping centers chewy.
- Unsalted butter (1/2 cup), softened: Room temperature butter creams properly; if you forget to soften it, set it on a warm plate for a few minutes.
- Both sugars (2/3 cup each): The combination creates depth; brown sugar especially adds moisture and keeps these tender.
- Egg (1 large) and extracts: The egg binds everything while the vanilla-peppermint combo gives that cozy, indulgent personality.
- Semisweet chocolate chunks (1 cup): Buy chunks instead of chips if you can; they don't disappear into the dough and create actual pockets of chocolate.
- Crushed peppermint candies (1/2 cup): Crush them yourself from full candies rather than using pre-crushed because the pieces stay intact better and the flavor is fresher.
- White chocolate for drizzling (3 oz): This is optional but it transforms them into something that feels more intentional and finished.
Instructions
- Gather and heat:
- Preheat your oven to 350°F and line baking sheets with parchment while you work. Cold sheets make cookies spread weirdly, but room-temperature ones (or even slightly warm ones) give you more control.
- Blend the dry team:
- Whisk flour, cocoa powder, baking soda, salt, and espresso powder together in a medium bowl, making sure there are no cocoa lumps hiding at the bottom. This step matters because it distributes the espresso evenly so you don't get surprise pockets of it.
- Cream your foundation:
- Beat softened butter with both sugars until the mixture looks light and fluffy, about two minutes with an electric mixer. You're aerating the dough here, which helps it rise and stay tender.
- Add your wet backbone:
- Add the egg, vanilla, and peppermint extract, beating until the whole mixture is pale and smooth. This usually takes another minute or so, and you'll see it visibly change texture.
- Fold in the dry:
- Gradually add the dry mixture to the wet mixture, stirring just until combined. Over-mixing here is how you end up with tough, cake-like cookies, so stop as soon as you don't see streaks of flour.
- Introduce chocolate and crunch:
- Fold in the chocolate chunks and half of the crushed peppermint candies, being gentle so you don't overwork the dough. Reserve the other half for topping because it stays fresher and brighter tasting.
- Scoop with intention:
- Use a tablespoon or small cookie scoop to form balls and place them two inches apart on your prepared sheets. This spacing matters because these cookies spread slightly and need room to breathe.
- Bake to perfect:
- Bake for 9 to 11 minutes until the edges look set but the very centers still jiggle slightly when you gently shake the sheet. They'll seem underbaked but they keep cooking as they cool, which is what gives you that fudgy center.
- Finish while warm:
- Pull them from the oven and immediately sprinkle the reserved peppermint candies on top while everything is still soft enough for them to stick slightly. Let them sit on the sheet for five minutes to firm up, then transfer to a cooling rack.
- Final touch:
- Once completely cool, drizzle with melted white chocolate if you're using it, and let it set before stacking or storing. This step feels fancy but makes them look intentional and taste even more indulgent.
 Save
Save My favorite memory with these cookies happened on a snowy afternoon when I made them for no reason at all, and the smell pulled my entire household into the kitchen. Suddenly we were gathered around the cooling rack, steam still rising, each of us breaking cookies in half to get to those soft centers—and that felt like the whole point of making them.
Storage and Make-Ahead Magic
These cookies keep beautifully in an airtight container at room temperature for up to five days, and they actually taste better the next day once all the flavors have had time to meld. If you want to get ahead, scoop the dough onto a baking sheet, freeze it solid, then transfer the frozen balls to a freezer bag for up to three months; bake straight from frozen, adding just a minute or two to the baking time.
Variations That Work Beautifully
I've swapped semisweet chocolate for dark chocolate when I wanted something richer and less sweet, and it absolutely changes the personality of the cookie in the best way. You can also reduce the peppermint extract slightly if you prefer subtlety, or add crushed pretzels to the dough if you want salty-sweet contrast that's genuinely addictive.
Pairing and Serving Ideas
These are obviously perfect with hot peppermint mocha, but I've also found they pair beautifully with dark coffee, hot chocolate, or even cold milk. They're the kind of cookie that works for casual gatherings, holiday platters, or those quiet moments when you just want something good to eat with your afternoon tea. Gift them in a pretty jar or box because they feel intentional enough to give away, and they always feel special.
- Serve them on a pretty plate or wooden board to make them feel even more special than they already are.
- Package extras in airtight containers tied with ribbon for gifts that taste better than anything you could buy.
- Make them the day before serving if you can so flavors have time to develop and deepen.
 Save
Save These cookies are the kind that remind you why baking matters—they turn an ordinary afternoon into something worth gathering around. Make them when you want to feel like you've done something kind, both for yourself and for whoever gets to eat them.
Recipe FAQs
- → What gives these treats their mocha flavor?
-
Instant espresso powder is used to infuse a deep mocha flavor into the dough without overpowering the sweetness.
- → How can I achieve a chewy texture?
-
Chilling the dough for about 30 minutes before baking helps develop a chewier crumb and better flavor melding.
- → Can I replace semisweet chocolate chunks?
-
Absolutely! Dark chocolate chunks can be used for a richer, more intense chocolate taste.
- → What role does peppermint extract play?
-
Peppermint extract adds a refreshing, cool note that complements the rich chocolate and espresso flavors beautifully.
- → How should these treats be stored?
-
Keep them in an airtight container at room temperature for up to five days to maintain freshness and texture.
- → Is the white chocolate drizzle necessary?
-
While optional, the melted white chocolate drizzle adds a festive touch and a creamy, sweet contrast to the rich cookie base.