 Save
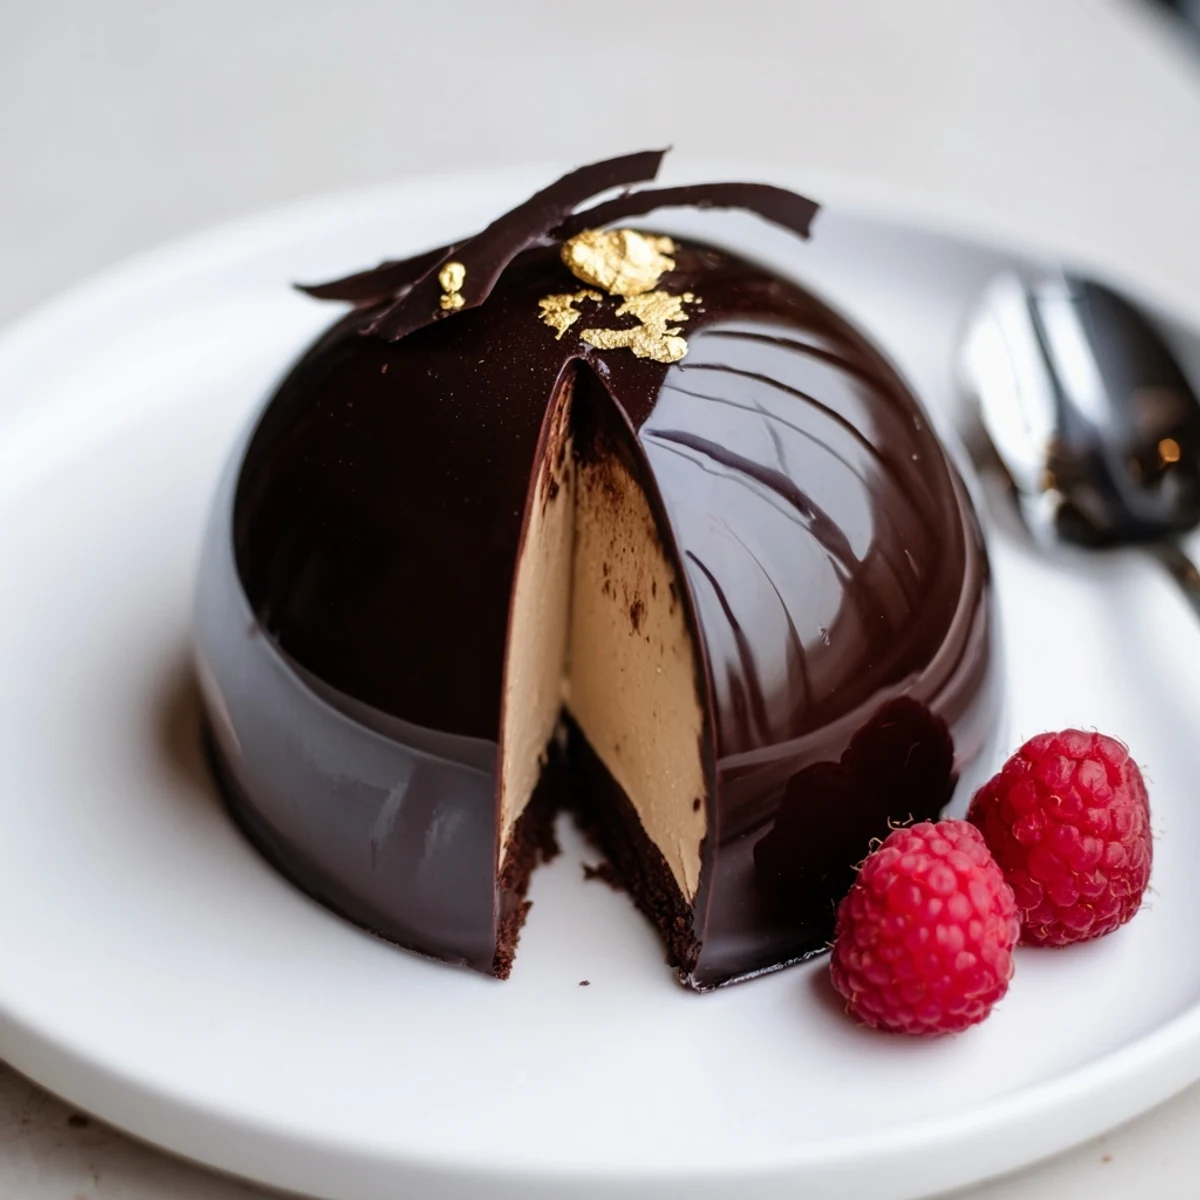
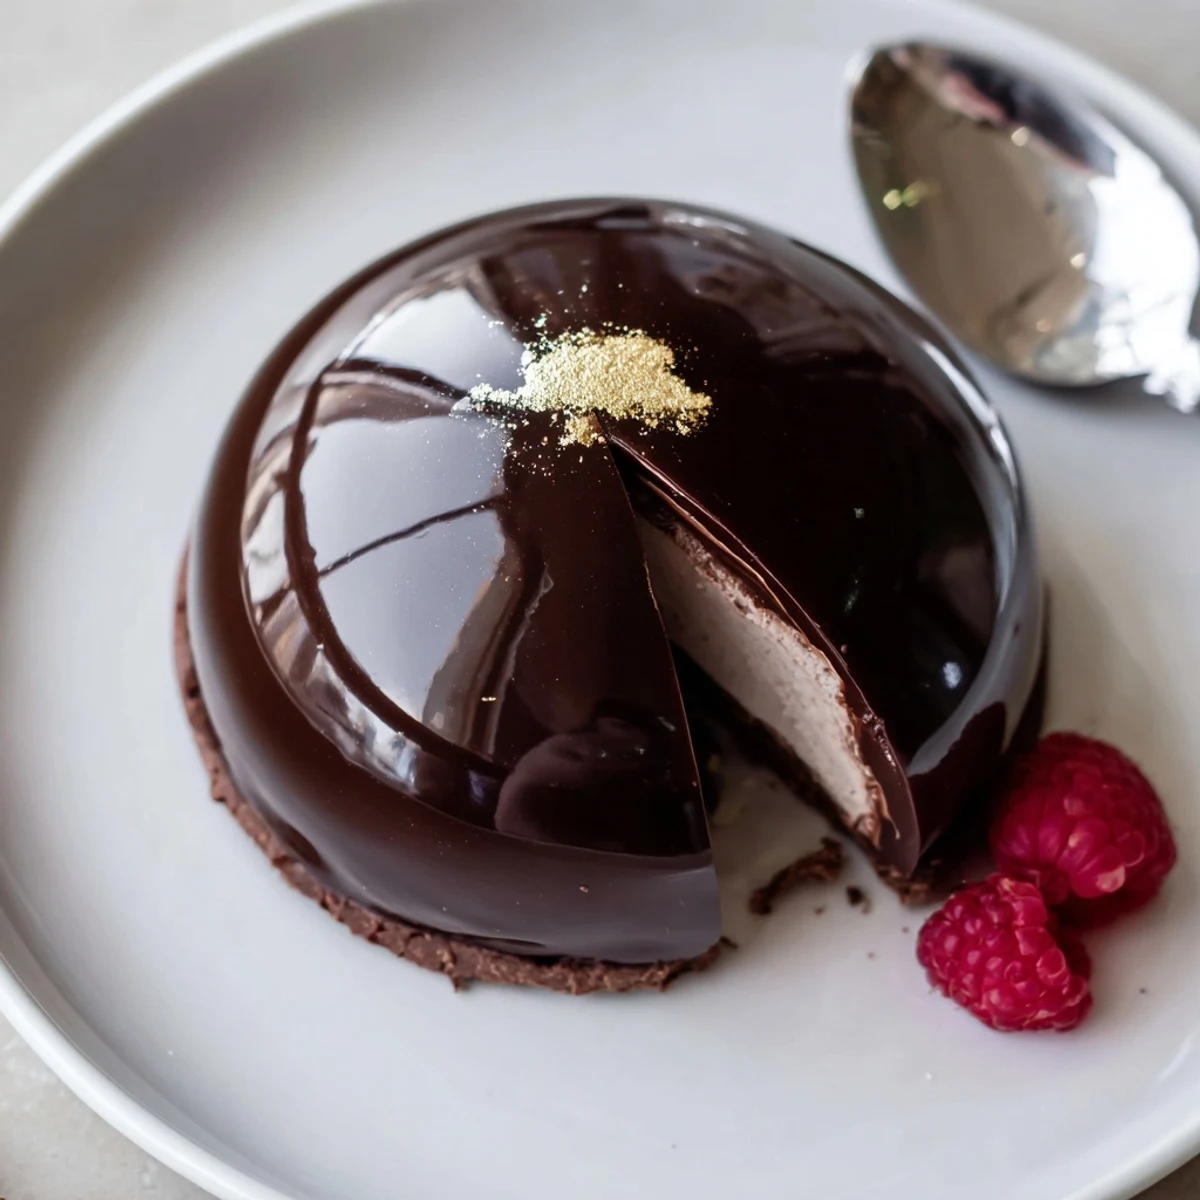
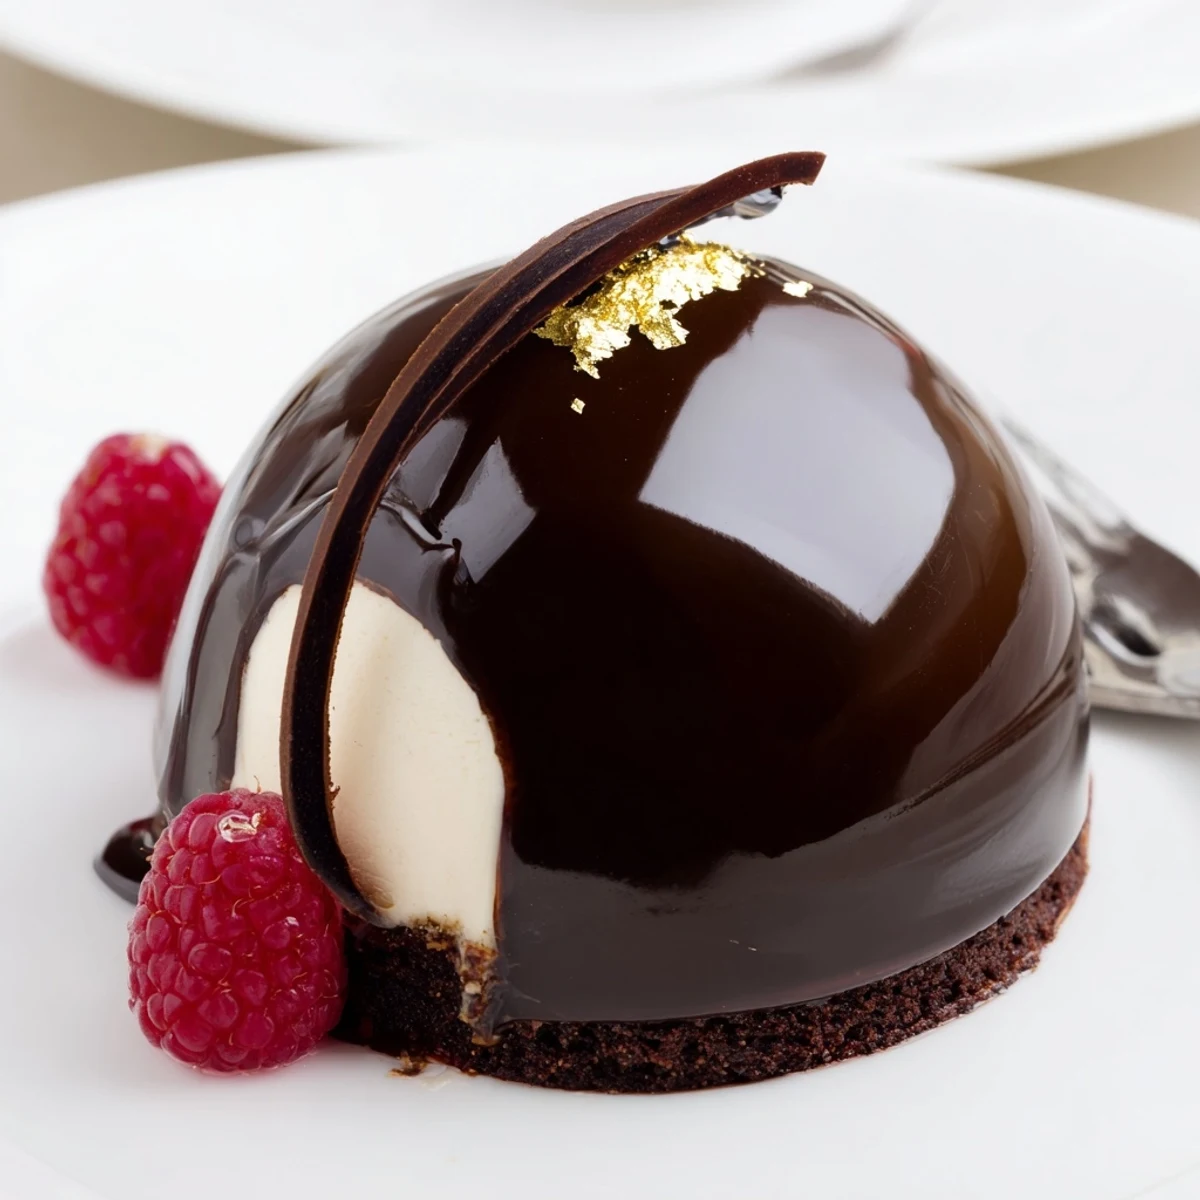
Save This elegant dessert layers a silky mascarpone mousse inside crisp dark chocolate domes, then cloaks each sphere in a glossy chocolate mirror glaze. Brush multiple melted chocolate coats into silicone molds for sturdy shells, bloom gelatin before folding into whipped mascarpone, and cool between steps. Glaze at about 30–32°C for a flawless sheen and chill before serving.
I’ll admit, the first time I attempted this chocolate mascarpone dome, I was seduced mostly by the shimmer of a mirror glaze mid-scroll on my phone. Suddenly the kitchen felt like the backdrop to a tiny culinary heist, tempering chocolate and whisking cream with nervous excitement, certain I’d leave my mark on the countertop forever. Even the anticipation was delicious—inhaling that bittersweet aroma as melted chocolate transformed into a glossy shell felt like a victory unto itself. If desserts could have stage lights, this is the one I’d put center stage.
I once made these domes for a small New Year's dinner when the air outside hummed with anticipation and the conversation inside grew louder with every bite. The first dome cracked perfectly and I caught a friend’s amazed expression—worth every minute hunched over the stovetop debating if the glaze was truly smooth enough. There was a moment when we all went quiet, savoring that harmonious collision of crisp chocolate and cloud-like cream. Somehow, the effort made it taste even better together.
Ingredients
- Dark chocolate (at least 60% cocoa), chopped: Crucial for a sturdy, snappy shell; I learned that lower cocoa leads to soft shells, so dark means drama and structure.
- Mascarpone cheese, chilled: Provides that uniquely velvety, slightly tangy backbone to the mousse—using it cold ensures a thick, glossy texture.
- Heavy cream, cold: Whips up fluffier when straight from the fridge; warm cream risks a soupy texture.
- Powdered sugar: Dissolves seamlessly, giving the mousse its silken sweetness—avoiding grainy bites is always worth it.
- Vanilla bean paste or extract: Vanilla works like a backdrop in this recipe; I prefer paste for those beautiful little flecks.
- Gelatin (sheets or powdered): Sets the mousse just enough so each dome holds its shape; always soften gelatine first.
- Cold water (for gelatin): Necessary if using powdered or to soften gelatin leaves, patience here equals a flawless set later.
- Water (for glaze): Combines with other ingredients for that flawless sheen—measuring carefully prevents cloudy glaze.
- Sugar: Sweetens and assists the glossy finish on the glaze, and it’s amazing how a slight reduction changes the whole consistency.
- Cream (for glaze): Adds richness, rounding out the cocoa’s bitterness for a luxurious finish.
- Cocoa powder, sifted: Sift it well: a single lump can undo all that smoothness you’ve worked for in the mirror glaze.
- Optional decoration (gold leaf, chocolate curls, fresh berries): Use these for that final flourish—gold leaf is an easy wow if you’re feeling fancy.
Instructions
- Melt and Brush Chocolate:
- Set a heatproof bowl over simmering water (or use microwaving in short intervals) to gently melt the chopped chocolate, inhaling that deep cocoa scent as it turns velvety. Using a pastry brush or the back of a spoon, thoroughly coat the insides of your silicone dome molds—try not to rush, and chill them until firm before giving them a second coat for strength.
- Whip Up the Mousse:
- While the shells set, soften gelatin in cold water (5 minutes for leaves); if you’re chatting, don’t forget it—over-soaked sheets get slippery. Whisk mascarpone, powdered sugar, and vanilla in a cool bowl; in another, whip the cream until it leaves soft peaks, then fold into the mascarpone blend as gently as tucking in a baby (don’t over-mix).
- Set and Spoon:
- Warm the gelatin just enough to dissolve, then swiftly stir it into your fluffy mousse. Spoon or pipe mousse into chocolate shells almost to the brim, smoothing the surface; let them chill at least 3 hours so they’re properly set before unmolding.
- Unmold with Care:
- Carefully pop the domes from their molds—a slight twist often does the trick—then line them up on a wire rack, ready for their glaze moment.
- Create the Mirror Glaze:
- Soften gelatin in cold water, then in a saucepan, whisk water, sugar, cream, and sifted cocoa together, bringing it just to a simmer so it’s smooth and glossy. Cool the mixture slightly (about 50°C if you have a thermometer), stir in gelatin until completely dissolved, and let it sit until it thickens to 32°C for flawless pouring.
- Glaze, Decorate, and Chill:
- Generously pour the glaze over the domes, letting gravity do its work—this part is mesmerizing if a bit messy. Transfer onto plates, garnish with gold leaf, chocolate curls, or berries, then chill for 30 more minutes (if you can wait) before serving.
 Save
Save The evening I first served these domes for a friend’s anniversary, their surprised laughter as the shell gave way with a fork turned the dessert into its own celebration. No one reached for their phone—everyone just lingered, savoring bites that seemed to stretch the night in the best way.
Lessons from Late Night Patisserie Experiments
I learned that prepping every bowl and utensil before starting makes the assembly much smoother, especially when handling fussy ingredients like chocolate. There’s something reassuring about the methodical rhythm—whisk, pour, chill—that makes the kitchen feel like a place of quiet focus, even amid glossy chaos.
Handling Chocolate Mishaps Confidently
Even after dozens of tries, I sometimes over-melt my chocolate or spot a stubborn bubble in the shell. All is not lost: patching up a thin spot or swirling an extra layer can rescue almost any shell without anyone ever noticing.
Final Touches That Dazzle
Those little details—like placing a shard of gold leaf just off-center or a trio of berries to catch the light—bring drama to the finished dome with minimal fuss. When in doubt, a confident pour of glaze does wonders. Don’t be shy to improvise decoration based on what’s at hand.
- Use a cooled room to set the glaze more evenly.
- A sharp, hot knife slices cleanly for serving.
- Save the best-looking dome for yourself—it feels like a private victory.
 Save
Save Behind all that shine and elegance is a little spirit of kitchen adventure—don’t be afraid to get your hands a bit messy or to share these domes with someone who’ll appreciate every bite. The best desserts, it turns out, leave memories as glossy as their mirror glaze.
Recipe FAQs
- → How do I make sturdy chocolate shells?
-
Melt chocolate gently and apply two to three thin layers with a brush or spoon, chilling between coats to set each layer. Aim for an even 2–3 mm thickness to avoid cracking and keep molds completely dry to prevent bloom.
- → How can I prevent the mascarpone from becoming grainy?
-
Use cold mascarpone and whip cream to soft peaks before folding gently to retain silkiness. Dissolve and cool gelatin slightly before folding it in to avoid overheating the mixture or curdling the cheese.
- → Is there a gelatin substitute for a vegetarian set?
-
Agar-agar can be used as a plant-based alternative, but it requires boiling and sets firmer; follow package instructions and test proportions, as texture will differ from gelatin-based mousse.
- → What’s the ideal temperature to pour the mirror glaze?
-
Cool the glaze to roughly 30–32°C (86–90°F) so it flows smoothly and sets with a glossy finish without melting the mousse or softening the shells.
- → How do I unmold the domes without damage?
-
Gently flex silicone molds or warm the outer surface a few seconds with your hands, then invert onto a wire rack. If needed, tap the mold edge lightly; avoid forcing the dome out to preserve the glaze finish.
- → How should finished domes be stored?
-
Store domes in a single layer in the refrigerator for up to 48 hours. Remove from chill 10–15 minutes before serving to allow the mousse to soften slightly for the best texture.