 Save
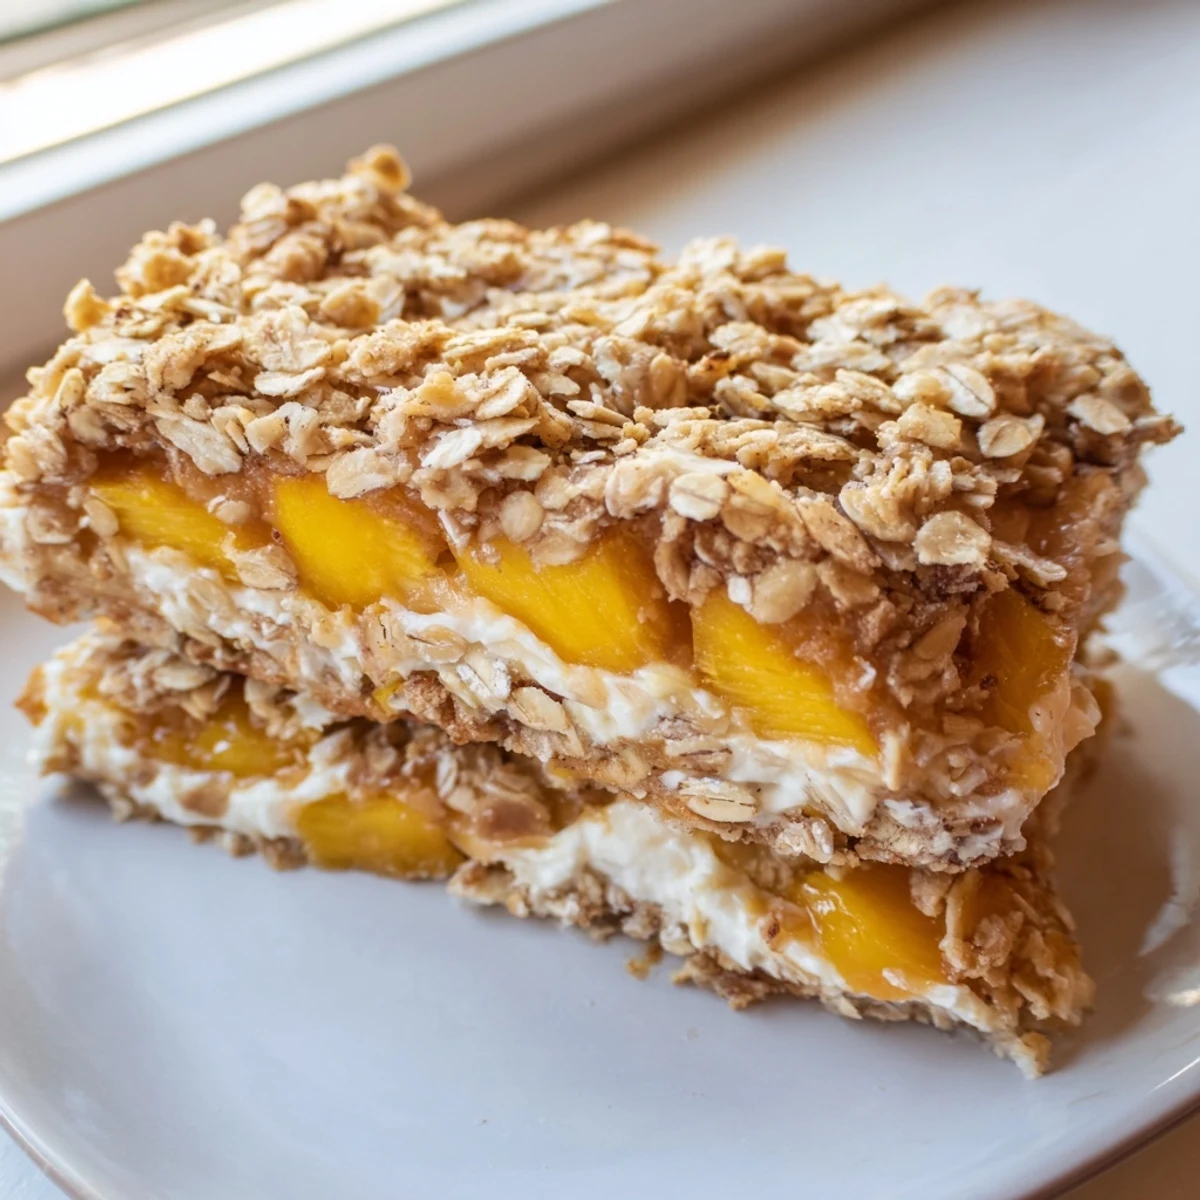
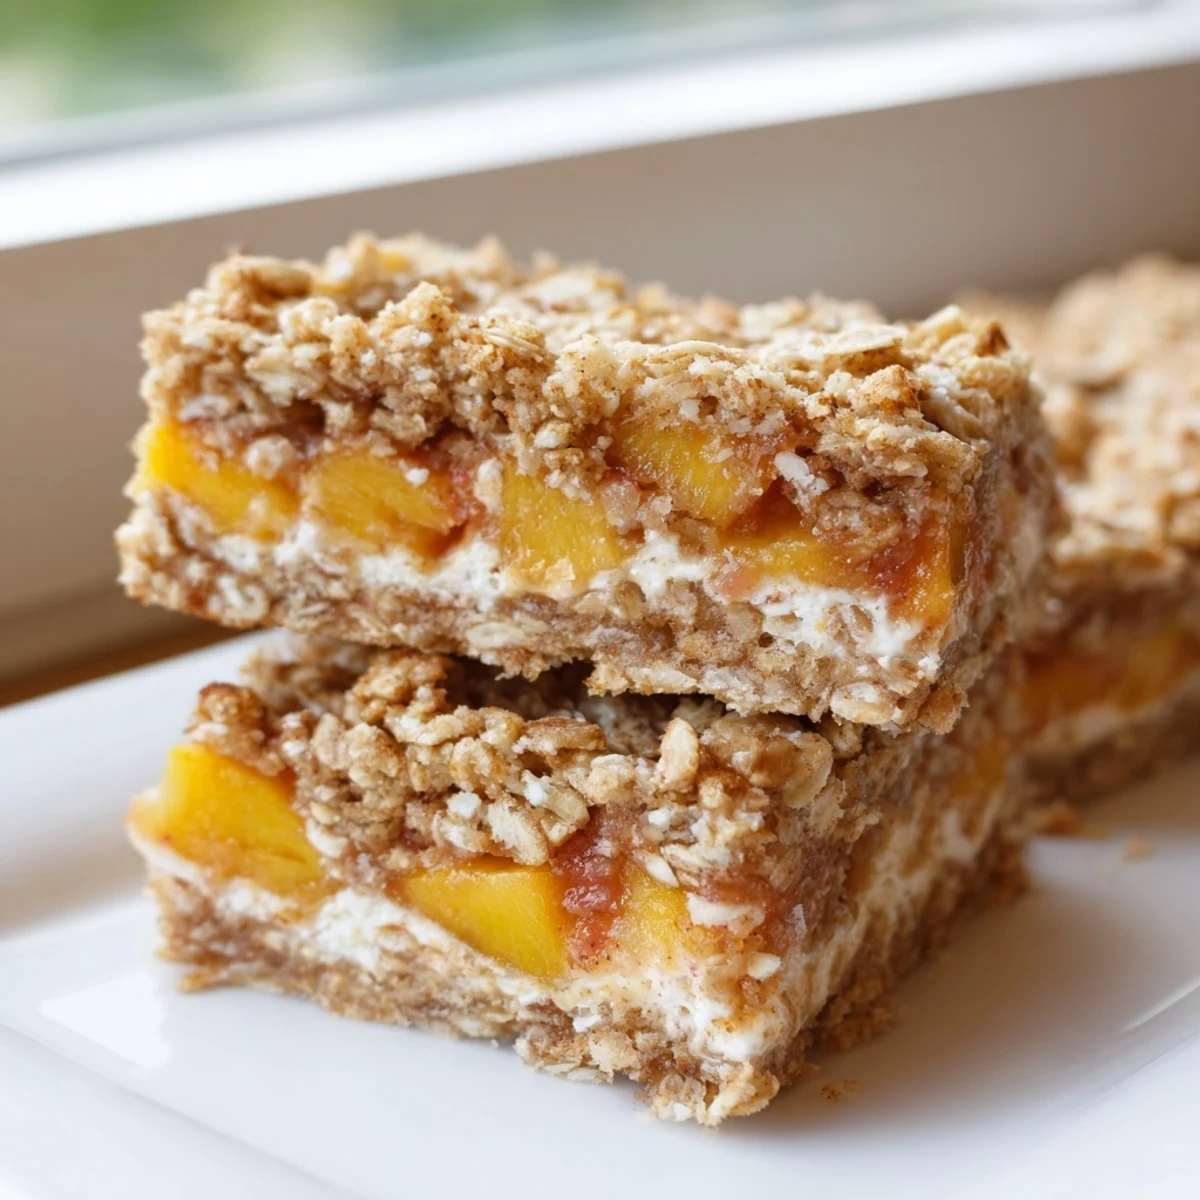
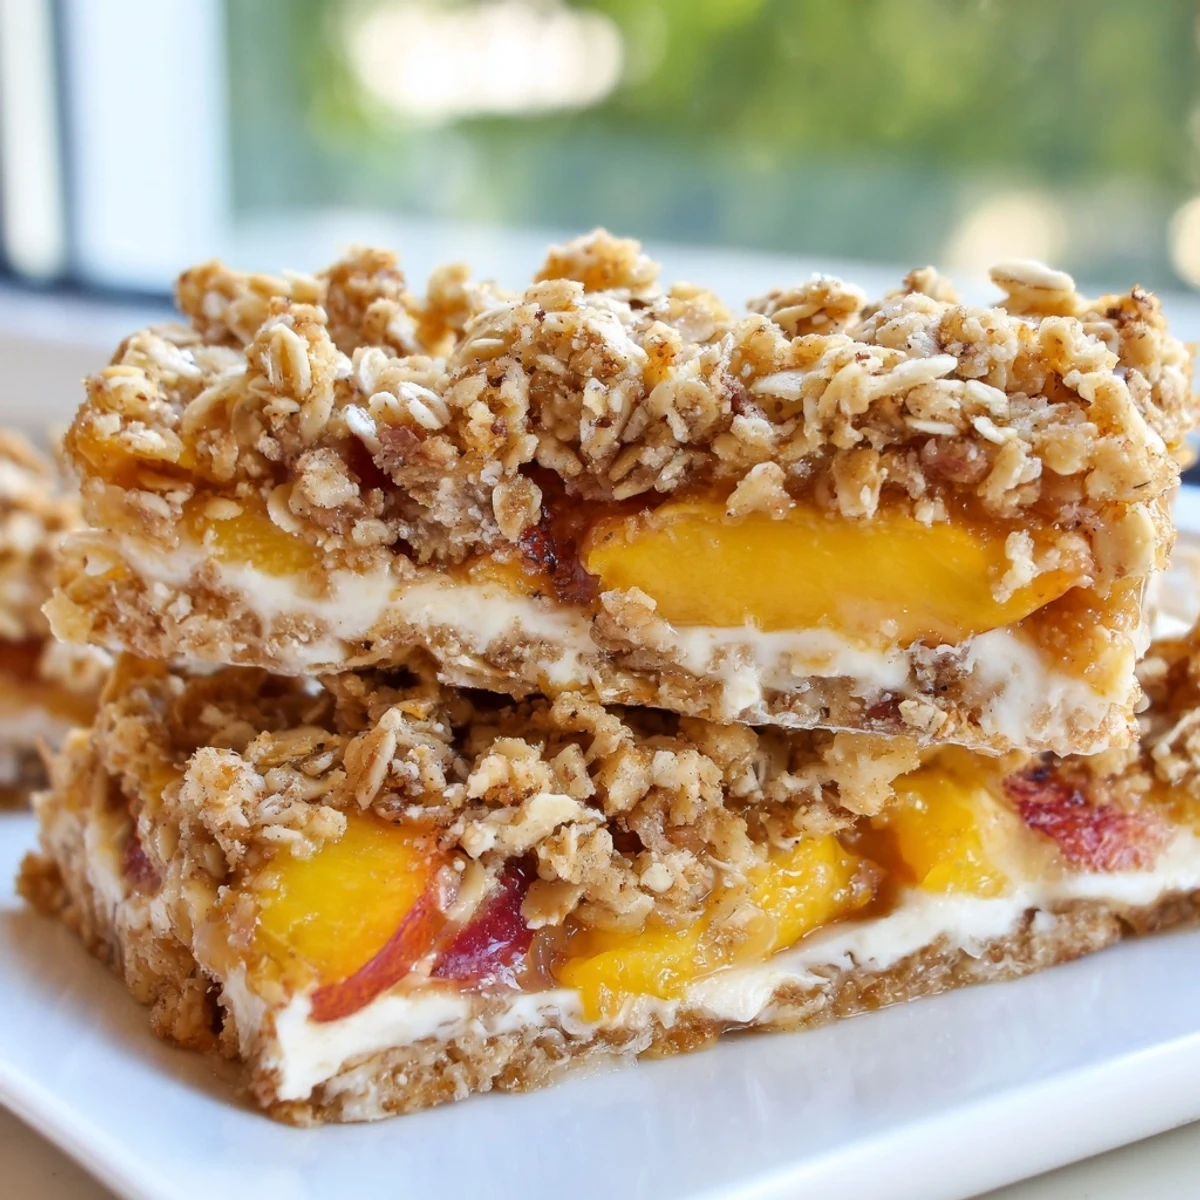
Save These bars feature three delicious layers starting with a buttery oat crumble base, followed by a smooth cream cheese filling, and topped with sweet diced peaches and more crumble. The combination of textures—crisp oat topping, creamy center, and tender fruit—creates an irresistible summer dessert that's both portable and crowd-pleasing.
Perfect for warm weather gatherings, these bars need time to cool and set properly for clean slices. The peaches release their natural juices during baking, creating a luscious fruit layer that pairs beautifully with the tangy cream filling. Serve chilled for the best texture, or bring to room temperature for a softer bite.
The smell of peaches ripening on the kitchen counter always makes me pause. Last summer, my neighbor brought over a basket from her tree, and I knew immediately they needed to become something special. These crumble bars were born that afternoon, a happy accident of too much fruit and a craving for something cozy.
I made these for a backyard barbecue and watched them disappear in twenty minutes. My friend Sarah, who claims she does not like dessert, went back for seconds. Now they are the most requested treat whenever we gather.
Ingredients
- All-purpose flour: The foundation that gives these bars their structure and keeps them tender
- Old-fashioned rolled oats: Use these instead of quick oats for better texture and that classic crumble bite
- Granulated sugar: Sweetens both the crust and filling while helping the oats crisp up beautifully
- Salt: Just a half teaspoon wakes up all the flavors and balances the sweetness
- Ground cinnamon: Warm spice that pairs perfectly with peaches and makes the kitchen smell incredible
- Unsalted butter: Keep it cold and cut into cubes before you start for the flakiest crumble texture
- Cream cheese: Make sure it is completely softened so your filling turns out silky smooth
- Egg: Room temperature eggs incorporate better and prevent any curdling in the cream layer
- Vanilla extract: Pure vanilla makes all the difference here, especially since it shines through
- Fresh peaches: Look for peaches that give slightly to pressure but are not mushy
- Cornstarch: Thickens the peach juices so your bars do not turn soggy
- Lemon juice: Brightens the peach flavor and helps the cornstarch work its magic
Instructions
- Preheat and prepare your pan:
- Set your oven to 350°F and line a 9x13-inch baking pan with parchment paper, leaving some overhang for easy removal later.
- Make the crumble base:
- Whisk flour, oats, sugar, salt, and cinnamon in a large bowl. Work in the cold butter with your fingers until you have coarse crumbs throughout.
- Press the foundation:
- Take two-thirds of your crumble mixture and press it firmly into the bottom of your prepared pan. Keep the rest nearby for the topping.
- Prepare the cream layer:
- Beat softened cream cheese and sugar until completely smooth, then add the egg and vanilla. Mix until combined and spread this over your crust.
- Prep the peaches:
- Toss your diced peaches with cornstarch, lemon juice, and sugar until everything is coated. Arrange this mixture evenly over the cream cheese layer.
- Add the topping:
- Sprinkle your reserved crumble mixture over the peaches, covering everything as evenly as possible.
- Bake to golden perfection:
- Bake for 38 to 42 minutes until the top is golden brown and the center looks set rather than jiggly.
- The patience step:
- Let the bars cool completely, then refrigerate for at least two hours before slicing into squares.
 Save
Save My mother-in-law asked for the recipe after trying them at our July picnic. She said they reminded her of the peach cobbler her grandmother used to make, but with a special twist.
Making These Ahead
The crumble mixture can be made and refrigerated up to three days before baking. I often prepare the dry ingredients on Sunday and bake fresh bars on Tuesday for a weeknight dessert that feels special.
Fruit Variations
These bars work beautifully with nectarines, apricots, or even sliced plums when peaches are not in season. Frozen peaches work well too, just thaw and drain them thoroughly before tossing with the cornstarch mixture.
Serving Suggestions
These bars shine on their own, but a dollop of whipped cream elevates them to dinner party status. For an easy dessert plate presentation, dust with powdered sugar and add a fresh mint leaf.
- Warm slightly in the microwave for about 15 seconds before serving
- Pair with a cup of Earl Grey tea for an afternoon treat
- Store covered in the refrigerator for up to four days
 Save
Save Every summer when peaches appear at the farmers market, these bars become a staple in our kitchen. Hope they find their way into your regular rotation too.
Recipe FAQs
- → Can I use frozen peaches instead of fresh?
-
Yes, frozen peaches work well in this dessert. Thaw them completely and drain thoroughly before tossing with cornstarch. Excess moisture can make the bars soggy, so pat them dry with paper towels if needed after thawing.
- → How long should I refrigerate the bars before cutting?
-
Cool completely at room temperature first, then refrigerate for at least 2 hours. For cleanest slices, chill for 3-4 hours or overnight. The cold sets the cream filling and makes cutting much easier.
- → Can I make these ahead of time?
-
Absolutely. These bars actually taste better the next day as flavors meld. Store in an airtight container in the refrigerator for up to 5 days. They can also be frozen for up to 3 months—wrap individual pieces in plastic and place in a freezer bag.
- → What other fruits can I substitute for peaches?
-
Nectarines work beautifully as a direct substitute. Berries like strawberries, blueberries, or raspberries also pair well with the cream filling. Adjust cornstarch slightly if using very juicy berries, and reduce baking time by a few minutes.
- → How do I know when the bars are done baking?
-
The crumble topping should be golden brown, and the center should be just set—slightly jiggly like custard but not liquid. A toothpick inserted in the cream layer should come out mostly clean. The bars will continue to set as they cool, so avoid overbaking.
- → Can I make these gluten-free?
-
Yes. Use certified gluten-free rolled oats and a reliable 1:1 gluten-free flour blend for the base and topping. The texture will be slightly different but still delicious. Ensure all other ingredients, particularly vanilla extract, are certified gluten-free.